Using cable restraints in Wisconsin requires alot of studying and memorizing specific rules and regulations. For the first couple years of using cable restraints, I suggest having your regulation book right next to you so you can be sure you aren't missing anything, and who knows, you might recognize someone on the cover this year ;)
There are many, many different cable restraint specifications that you need to know. I will list the "basics", meaning if you came to this blog for a simple question, I'll probably answer it in this post. For more in depth answers, check out the regs.
The first and most important tip that I can give you is that you should not be trying to make your own cable restraints if you are brand new to cables or trapping. In Wisconsin, the laws are too strict for you to take a chance. So I suggest buying WISCONSIN LEGAL cable restraints from a reputable cable maker. I personally have seen some of the "big suppliers" who claim they have WI Legal cable restraints and they still have the wrong lock, or wrong length, so triple check your cables before setting them!!
The cables that I personally use can be found at here: Southern Snares & Supply, and Brian, the owner, has been working with me for many years so he is very well-versed on Wisconsin regulations and the most recent changes to cable restraints as well.
 |
| One month's catch using Southern Snares cable restraints |
Here are some of the basics for Wisconsin legal cable restraints:
- Cable must be 7x7, 7x19, or 1x19.
- Cable must be 3/32 or larger.
- Cable must include a max loop stop and deer stop.
- Cable must have a relaxing reverse-bend washer lock.
- Cable must be atleast 5 feet long but no longer than 7 feet.
- Cable must have atleast ONE swivel, but more are better.
- Cable must have a breakaway device for 285 pounds or 350 pounds, your choice.
- Cable must be anchored, no drags allowed!
- Cable must not entangle in debris, so no fences, posts, etc.
- Entanglement is any rooted, wooded vegetation w/ a diameter greater than 1/2 inch.
- Some type of support wire, usually 9 ga
 |
| A basic cable set up in the field. |
My set up:
Prior to the start of each season, which runs Dec. 1-Feb. 15, I will prep my cable restraints. While still coiled up, I spray a light layer of tan spray paint over my cables. I do not boil in baking soda. Baking soda will rust the inner cables and I feel it weakens my cable, making them more susceptible to breaks and chewouts. Some guys will disagree, this is just my story and I'm sticking to it.
Once dry, I take one cable restraint, add a quick link to the bottom swivel, attach a wolf fang earth anchor, add my trap tag, then put each set in a gallon ziplock freezer bag. This keeps everything organized and you are ready to go at the start of each day. If you find a new property, you have everything you need to set in that moment. If you want to walk across a huge field to set 5 or 6, you only need to carry 5 or 6 gallon bags. And dozens fit perfectly in a 5 gallon bucket.
Once dry, I take one cable restraint, add a quick link to the bottom swivel, attach a wolf fang earth anchor, add my trap tag, then put each set in a gallon ziplock freezer bag. This keeps everything organized and you are ready to go at the start of each day. If you find a new property, you have everything you need to set in that moment. If you want to walk across a huge field to set 5 or 6, you only need to carry 5 or 6 gallon bags. And dozens fit perfectly in a 5 gallon bucket.
To view me making a cable restraint set, please click on this youtube video (it was too large to load in this blog post): https://www.youtube.com/watch?v=hik2umcsG00
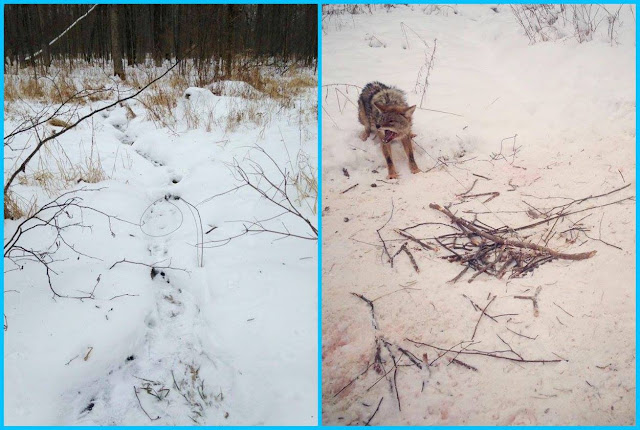
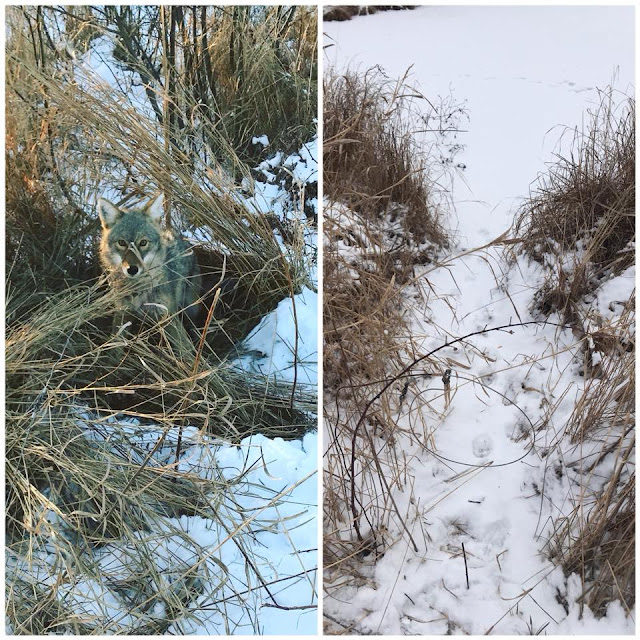
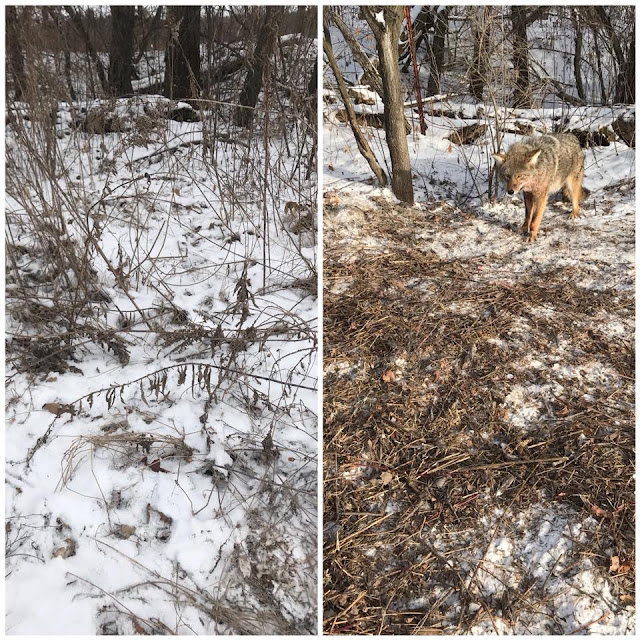
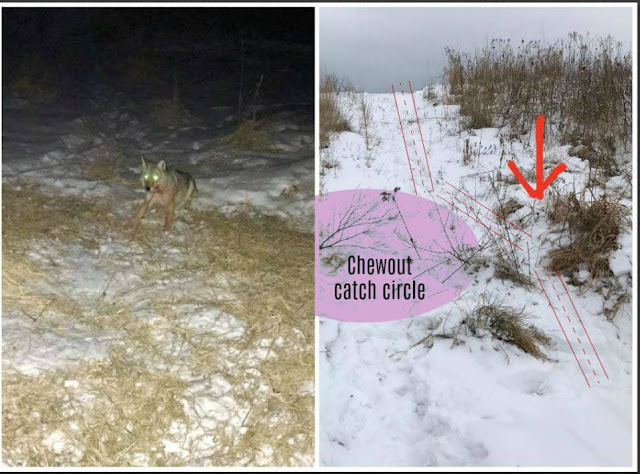
Here are some catch pictures that I wanted to show so you can visualized what the catch circle will look like. Notice how it is HUGE compared to a foothold, and how the area is tore up and will not be reusable usually for another cable. This circle is what you need to visualize when making your cable set. If you have any entanglement in the catch circle, it would be an illegal set.
Here are some "before and after" pictures so you can see the original set that I made, then the catch afterwards. You are targeting the neck when setting your cable for coyotes. I personally make a 9 inch loop, 9 inches off the ground. Adding a chin lift will draw their face upwards and off the trail, which helps guide them into the loop. Note in these pictures how OBVIOUS the cables look to us, and you might think, how could a coyote ever stick it's head in there??! But at night, these cables blend in and they go right through them without thinking a thing is wrong.
Here are a few videos that I wanted to show you what it's like to actually walk up on a caught coyote. They are powerful animals, and because we can't use snares in Wisconsin, we have to keep them alive all night, meaning they are jumping and fighting the cable when you get there. Having your dispatch gun loaded and ready is a good thing to do because if this cable breaks, you still could have a second or two to fire off a round.
After you catch a coyote, the cable restraint is not able to be used again. You can salvage some parts like the swivels and support collars, but they are cheap enough that you can simply toss them.
Good luck, and if this blog helped you in any way, please feel free to comment with your success!


